February 25, 2013
Mignardise

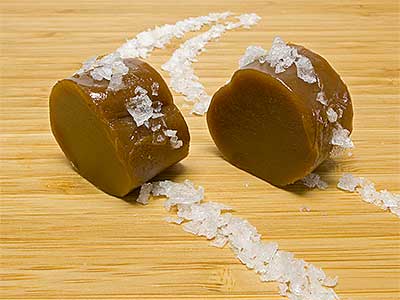
caramel à la fleur de sel
(salted caramel)
Sometimes you just have to. You have no choice. You couldn’t change your mind if you wanted to. You’re stuck. I know I was. Or at least my spatula was. It was stuck to the bottom of the saucepan I had just used for making caramel candies. But I had no choice. I had to make the caramels.
I normally don’t like caramels. Their great sugary flavor isn’t worth the effort it takes to eat them. They were common in the candy dishes of my childhood and always caused my teeth problems. They looked so good in their cellophane wrappers, but I learned from experience that at best they would get stuck to my teeth and only take an hour to dissolve. At worst, they would hasten the removal of any loose fillings or crowns. So I’m not sure why I decided one day that I had to learn how to make caramel candies.
I’m glad I did. By making my own, I found that I could make what the commercial producers call “short” caramels. The term doesn’t refer to stature but to the fact that my caramels are too soft to sit out on a warm day. I keep the caramels under refrigeration until about 30 minutes before serving. They have all the caramel flavor that people like, plus they dissolve easily and barely stick to your teeth. (I haven’t lost a filling, yet!)
The current “in” thing with caramels is to add fleur de sel or some other fancy salt to them. The aisles of the 2012 NASFT Winter Fancy Food Show seemed to be extra-crowded with candy producers selling caramels made or finished with some fancy salt. With some, the salt provided a nice crunch, but in others it was barely, if at all, noticeable. There were also a few stalls with bacon-flavored caramels, so I assume that these will the “in” caramel next year.
No one knows when and where the first caramel candies were produced, but concensus guess is mid-19th century America. Even Milton Hersey was manufacturing caramels towards the end of the century, long before he started producing his iconic chocolate bars. He had learned the process from a Denver-based candy maker in the 1880s.
There are hundreds of recipes on the Internet for caramels, so I don’t remember why I chose the recipe I did. Maybe because it stood out as being different than the other recipes. It has proportionally more cream and less sugar. I assume, this is why the results come up “short.” This version will produce about 16 caramels.
100 g (1⁄2 c)
granulated sugar
60 ml (1⁄4 c)
light corn syrup
120 ml (1⁄2 c)
water
350 ml (1-1⁄2 c)
heavy cream
70 g (5 T)
unsalted butter
1 t
fine salt
1⁄2 t
vanilla extract
fleur de sel, for sprinkling
1. Line the bottom and two opposite sides of a 20-cm (8-in) square metal baking pan with parchment paper. Trim the paper carefully so it goes completely into the corners. Hold the paper in place by brushing it lightly with vegetable oil. If the “flaps” don’t stay “up” by themselves, tape them in place to the outside of the pan. Set the pan aside on a level, heatproof work surface.
2. In a deep saucepan, combine the sugar, corn syrup, and water. Place the saucepan over medium-high heat. Bring to a boil, and continue cooking until a golden caramel color is obtained.
3. In the meantime, place the cream, butter, salt, and vanilla in a separate saucepan, and bring to a simmer.
4. When the caramel is ready, remove its saucepan from the heat, and carefully add the cream mixture to the caramel. Return the saucepan to medium heat. Continuously stir the mixture with a wooden spatula or spoon until the temperature reaches 120 °C (248 °F), about 10 to 15 minutes.
5. Quickly pour the hot caramel into the level, prepared baking pan. Set the pan in the refrigerator until the caramels are cool and firm. Be sure that the pan bottom is still level.
6. When fully chilled, remove the pan with the caramel mixture from the refrigerator, and bring it to room temperature.
7. Using the parchment-paper flaps, lift the caramel from the baking pan and place it on a flat cutting board. Using the flaps, roll up the caramel from one side until the roll reaches the center. Do the same with the caramel on the opposite end of the paper. Carefully cut the caramel and paper connecting the two rolls. Wrap the excess parchment paper around each roll, and tightly wrap each roll in plastic wrap. Refrigerate until needed.
8. To serve, cut each roll through the plastic and paper into 8 pieces. The cutting is easiest with a long slicing knife. Be sure to slice to reduce the amount that the ends of the caramel pieces are pushed downward. Carefully remove the plastic wrap and parchment paper that cloaks each piece.
9. Bring the caramels to room temperature before serving. Arrange the pieces on a serving plate, and sprinkle each piece with a little fleur de sel or other finishing salt.
Note: If you want to give these caramels a bacon flavor, substitute clean, rendered fat from smoked bacon for the butter in the recipe.
© 2013 Peter Hertzmann. All rights reserved.
